
DIY Kitchen Wrapping vs Professional Kitchen Wrapping
You’ve seen the YouTube videos. Someone peels a sheet of vinyl off its backing, smooths it over a cabinet door, and ten minutes later the kitchen looks brand new. It seems straightforward enough, and with rolls of vinyl available on Amazon, you can see why people are tempted to try it themselves.
But there’s a reason those videos cut between the first door and the finished kitchen. The bit in the middle, where things start going sideways, rarely makes it into the final edit.
We’re not here to tell you that DIY kitchen wrapping is impossible. It isn’t. But the gap between a DIY finish and a professional one is bigger than most people expect.
By the time you’ve bought the tools, wasted a roll or two, and spent your entire weekend in the kitchen with a squeegee, the savings aren’t always what they seemed.
What is kitchen wrapping?
Kitchen wrapping is the process of applying a self-adhesive vinyl film over your existing cabinet doors, drawer fronts, worktops, and splashbacks to give them a completely new look.
Instead of ripping out a dated kitchen and replacing it, you keep the carcasses and transform the surfaces with architectural-grade film. It comes in hundreds of colours and finishes, from matt white and gloss grey to wood grain and marble effects.
The technique originally came from vehicle wrapping, where cars are wrapped for branding or colour changes. It’s been adapted for interiors over the past decade, and done well, the result is a kitchen that looks fully refitted without any of the disruption.
Can you wrap a kitchen yourself?
Technically, yes. Self-adhesive vinyl is available to buy online, and you don’t need any formal qualifications to apply it. For a single cupboard door or a small flat panel, a careful DIYer with some patience can get a decent result.
The problems start when you scale up. A full kitchen means dozens of surfaces, edges to wrap around, cutouts for hinges and handles, and areas near the hob where heat tests the adhesion daily. That’s a different job entirely from one flat door on a workbench.
What you need for DIY kitchen wrapping
If you’re going to attempt it yourself, you’ll need more than just a roll of vinyl. The basic toolkit includes a felt-edged squeegee, a sharp craft knife with spare blades, a heat gun for softening film around curves, a tape measure, masking tape, and degreasing cleaner.
Dull blades are a common problem. They drag and tear the vinyl rather than cutting it cleanly, and you’ll get through more blades than you expect.
Then there’s the vinyl itself, and this is where many DIYers make their first mistake. The rolls sold on Amazon and eBay are not the same material that professionals use. Consumer-grade vinyl is thinner, less forgiving, and more prone to peeling within the first year.
Professional installers work with architectural-grade film from brands like Bodaq and Cover Styl’. It’s a different product entirely, engineered to hold its adhesion and colour far longer than anything you’ll find in a consumer marketplace.
Where DIY kitchen wrapping goes wrong
The tutorials make it look simple because they’re filmed under controlled conditions, usually on a flat surface with good lighting and no time pressure. In a real kitchen, with cabinet doors still on their hinges and worktops cluttered with toasters and kettle leads, the experience is different.
Air bubbles and creases
Getting vinyl to lie completely flat across a full cabinet door takes practice. Even with a squeegee, first-timers tend to trap air bubbles under the film, especially near the edges.
You can prick them with a pin, but the fix is visible up close. If the bubble is large enough you’ll need to peel the vinyl back and reapply, which risks stretching it out of shape.
Edges that lift and peel
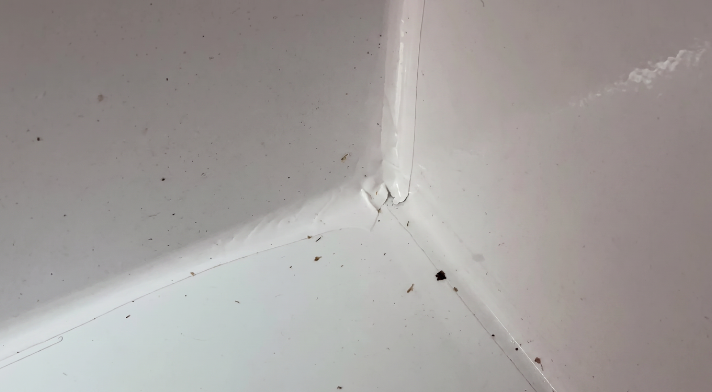
Wrapping vinyl around the edges of a door so it stays put is the hardest part of the job. Professionals use a heat gun at the right temperature to soften the film, then fold and press it around corners so it bonds tightly to both faces.
Without that technique, the edges are the first place the vinyl starts to lift. Once one corner comes up, the rest tends to follow within a few weeks.
Misaligned cuts and wasted material
Vinyl doesn’t forgive measurement errors. Cut a piece too short and it’s scrap. Cut it too long and you’re left trying to trim the excess flush against the cabinet edge, which often means scratches on the surface you’ve just wrapped.
Most DIYers go through considerably more material than they planned for, because each mistake means another metre of vinyl wasted.
Surface prep shortcuts
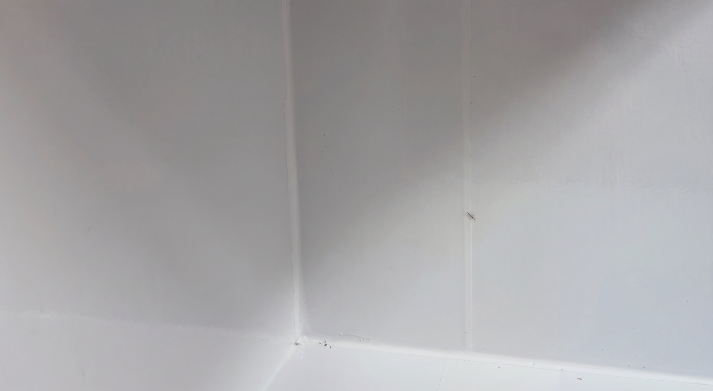
This is the invisible problem. If the surface isn’t completely clean, dry, and free of grease before you apply the vinyl, the adhesion will fail. Not immediately, but over weeks and months as the film gradually lifts in patches.
Kitchen cabinets near the hob are the worst for this because years of cooking leaves a thin film of grease that normal cleaning doesn’t fully remove. Professionals sand and degrease with specialist solutions before applying anything.
What a professional kitchen wrapper does differently
The difference between DIY and professional kitchen wrapping isn’t just skill, although that matters. It’s the materials, the tools, and the approach to preparation that separate a finish lasting two years from one lasting seven to ten.
A professional wrapper will assess your kitchen first, checking every cabinet door, drawer front, and worktop to make sure the surfaces can hold the vinyl. If a door is warped or the laminate is peeling, they’ll flag it before starting rather than wrapping over a problem.
The vinyl itself is a different grade. Architectural film is thicker, more flexible, and engineered to hold its bond through temperature changes and daily wear. It comes in satin, gloss, or matt finishes that look and feel like the real material, not a sticker on a cupboard.
And the application technique matters. Heat forming around edges, seamless joins where two sheets meet, and careful trimming around hinge cutouts all take hundreds of kitchens’ worth of practice.
That’s why a professional team can wrap a full kitchen in one to two days, while a DIYer might spend an entire weekend on just the cabinet doors.

DIY vs professional kitchen wrapping: what you actually get
On paper, DIY looks like the obvious choice. Buy a few rolls of vinyl, grab a squeegee and craft knife, and you’re away. But that assumes everything goes right first time, and that almost never happens.
Factor in a wasted roll from a bad measurement, a heat gun purchase because the hair dryer wasn’t cutting it, and replacement vinyl for the doors where edges lifted after a fortnight. The materials add up faster than most people expect.
With professional wrapping, you’re paying for the result as much as the labour. Architectural-grade film that lasts seven to ten years, surface prep that prevents peeling, edges that stay bonded, and a kitchen you can use again the next day.
The real question isn’t about the numbers on a quote. It’s whether you want a finish that looks like a new kitchen or one that looks like a weekend project. A free estimate from a professional wrapper gives you a clear picture of what’s involved, so you can make that comparison yourself.
When DIY kitchen wrapping might make sense
We’d be dishonest if we said DIY is never the right call. There are situations where having a go yourself is perfectly reasonable.
If you have a single flat cupboard door or a fridge panel that needs freshening up, that’s a manageable project. The surface is flat, there are no tricky edges, and if it doesn’t come out perfectly you’ve only used one piece of vinyl.
Similarly, wrapping a small section as a trial before committing to a full kitchen is a sensible way to test the waters without real risk.
But for a full kitchen with twenty-plus doors, drawer fronts, worktops, and potentially splashbacks, the complexity scales faster than most people anticipate.
Why most homeowners choose professional wrapping
When people contact us, they’ve usually already considered doing it themselves. Some have even started and hit trouble with the first few doors. The reasons they end up choosing professional installation tend to be the same.
First, the finish. A professionally wrapped kitchen looks like a brand new kitchen, not a DIY project. The vinyl sits flat, the edges are invisible, and the colour is consistent across every surface. You can see this for yourself in our portfolio of completed kitchens.
Second, the time. A professional team will have your kitchen wrapped in one to two days with minimal disruption, so you’re not losing your kitchen for an entire weekend while you figure things out door by door.
Third, the durability. Because the surface prep is thorough and the vinyl is architectural grade, a professional wrap typically lasts seven to ten years. That’s years of use from one job, without corners lifting or colours fading.
And fourth, the guarantee. If anything does go wrong, a professional wrapping company stands behind the work. With DIY, you’re on your own.
Frequently asked questions
Is it hard to wrap kitchen cabinets yourself?
A single flat door is manageable with patience and a steady hand. Wrapping a full kitchen, with edges, cutouts, and different surface types, is significantly harder and requires practice, the right tools, and proper surface preparation to get a lasting result.
How long does DIY kitchen wrapping last?
It depends on the quality of the vinyl and the application. Consumer-grade vinyl from high street or online retailers may start peeling within one to two years, especially on edges and near heat sources. Professionally applied architectural film typically lasts seven to ten years.
What tools do I need to wrap kitchen cabinets?
At minimum, you’ll need a felt-edged squeegee, a sharp craft knife with spare blades, a heat gun (a hair dryer works at a push but is less effective), a tape measure, masking tape, and degreasing cleaner. Most of these are available from DIY shops, though a proper heat gun is worth sourcing separately.
Is wrapping better than replacing kitchen doors?
If your cabinets are structurally sound, wrapping saves you the disruption, waste, and lengthy timeline of a full kitchen replacement. You keep the carcasses, transform the visible surfaces, and the whole job is done in a day or two rather than weeks. For a clear idea of what’s involved, request a free estimate and we’ll talk you through it.
Can you wrap worktops as well as cabinets?
Yes. Professional wrappers can apply vinyl to worktops, splashbacks, plinths, and end panels as well as cabinet doors and drawer fronts. Worktops need a more durable film that can handle heat and daily use, which is another reason professional-grade material matters.
Is kitchen wrapping worth it?
If your cabinets are structurally sound but look dated, wrapping transforms your kitchen without the waste and disruption of a full refit. It keeps good carcasses out of landfill and gives you a fresh look in days rather than weeks, with a professional finish that lasts seven to ten years.
Ready to see what professional wrapping looks like?
If you’re weighing up DIY against professional kitchen wrapping, why not start with a free estimate? We’ll visit your kitchen, assess the condition of your cabinets, and talk you through the finishes and options available so you know exactly what’s involved.
Give us a call on 0141 777 5027 or request a free estimate online.